
")
In modern application development, storing sensitive information like API keys, database connection strings, and certificates directly in yonur code or configuration files poses significant security risks. Azure Key Vault offers a robust solution for securely managing these sensitive pieces of information.
Why Store Sensitive Information Securely?
- Security Risk Mitigation: Prevents exposure of credentials in source code repositories
- Simplified Management: Centralized location for all secrets across multiple applications
- Access Control: Fine-grained permissions management
- Audit Capabilities: Track who accessed what and when
Setting Up Azure Key Vault
Step 1: Create an Azure Key Vault
- Log into the Azure Portal
- Navigate to “Key Vaults” and select “Create”
- Fill in the required information:
- Subscription: Your Azure subscription
- Resource Group: Create new or select existing
- Key Vault Name: Choose a unique name
- Region: Select your preferred region
- Click
Review + Createfollowed byCreate
Step 2: Configure Managed Identity for Your Application
For your application to access Key Vault securely, you need to:
1. Enable Managed Identity for your App Service:
- Navigate to your Azure App Service
- Select
Identityfrom the left menu
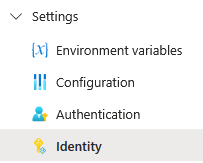
- Under the
System assignedtab, toggle the status toOn

- Click
Saveto confirm
2. Grant the Managed Identity access to the Key Vault
- Go to your Key Vault
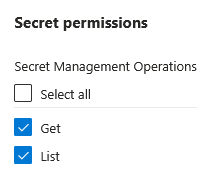
- Select
Access policiesfrom the left menu - Click
+ Add Access Policy - Select
GetandListpermissions underSecret permissions
- Under
Select principal, search for your App Service name - Select your App Service and click
Add - Don’t forget to click
Saveon the main Access policies page
This step ensures your application can access secrets from Key Vault without needing to store any credentials.
Integrating Azure Key Vault with .NET Applications
Install Required Packages
Add these NuGet packages to your project:
dotnet add package Azure.Identitydotnet add package Azure.Extensions.AspNetCore.Configuration.SecretsThese allow you to authenticate with Azure and load secrets into your configuration.
Setup App Settings
Find your Key Vault URI in the resource Overview page under the Vault URI section.
Add your key vault into app settings so that the code can use it to access the confidential information stored in the vault.
{
  "KeyVault": "https://<your-keyvault-name>.vault.azure.net/"
}
Setup Program.cs
The following code loads configuration from appsettings.json, then connects to Azure Key Vault in production using DefaultAzureCredential so secrets can be accessed like normal config values.
if (builder.Environment.IsProduction())
{
    // Load base and environment-specific config files
    string environment = Environment.GetEnvironmentVariable("ENVIRONMENT");
    string jsonFile = $"appsettings.{environment}.json";

    builder.Configuration
        .AddJsonFile("appsettings.json", optional: false, reloadOnChange: true)
        .AddJsonFile(jsonFile, optional: true);

    // Get Key Vault URL from config
    string? keyVaultUrl = builder.Configuration["KeyVault"];

    // Authenticate using managed identity or local credentials
    var credentials = new DefaultAzureCredential();

    // Add secrets from Azure Key Vault to app configuration
    builder.Configuration.AddAzureKeyVault(new Uri(keyVaultUrl), credentials);
}
Lets break this code down and explain what each section does:
- Checks if environment is production
if (builder.Environment.IsProduction())- Reads the current app environments config:
string environment = Environment.GetEnvironmentVariable("ENVIRONMENT");
string jsonFile = $"appsettings.{environment}.json";
builder.Configuration
    .AddJsonFile("appsettings.json", optional: false, reloadOnChange: true)
.AddJsonFile(jsonFile, optional: true);- Authorises access to the key vault using your Managed Identity.
DefaultAzureCredential tries multiple authentication methods in order. Like environment variables, managed identity, and developer tools (e.g. Visual Studio), and uses the first one that works.
You can replace it with a more specific credential like “ManagedIdentityCredential” if needed, but for most cases, “DefaultAzureCredential” is the easiest and simplest choice.
var credentials = new DefaultAzureCredential();Access the Key Vault values in your code.
- Setup the key value pair in your
appsettings.json.
"ExternalServiceOptions": {
  "ApiKey":"",
  "BaseUrl":""
}- Create a model to represent the Key Vault entity.
public class ExternalServiceOptions
{
    public string BaseUrl { get; set; }
    public string ApiKey { get; set; }
}- Access the value retrieved from your Azure Key Vault by using the
IOptionsInterface combined with a custom class to represent the entity.
public class HereMapsApiService : IHereMapsApiService
{
   private readonly ExternalServiceOptions _serviceOptions;

   public TestService(IOptions<HereMapsRoutingApiClientOptions> serviceOptions)
       {
           _serviceOptions = serviceOptions?.Value;
       }

   public async Task SampleMethod()
   {
        var keyVaultValue = _apiOptions.ApiKey;
   }
}